Netgear Genie Login Smart Wizard Setup
Setup for Netgear Genie
To configure your extender utilizing the Netgear genie smart setup technique, follow the instructions below:
- You should join a wireless network using your extension.
- Connect any device to the existing network.
- Launch a web browser.
- Enter mywifiext.net as the URL.
- Your default username and password should be entered.
- The Genie setup page will open on your device.
- After that, adjust the technical setting as necessary.
Don’t worry; if you run into any problems while completing the tasks above, we can assist you. Simply get in touch with our technical specialists and ask them to set up your Netgear extender.
Netgear Genie Smart Wizard Setup
Netgear Genie Login Guide
What steps does the Netgear Genie Wizard take to configure my extender?
Here, we outline how to configure your Netgear extender for Netgear Genie setup. For Netgear Genie setup, adhere to the instructions displayed on-screen:
- Connect your extender first.
- Your device must be connected to the accessible network.
- Fire up your web browser.
- Type 192.168.1.250 or mywifiext.net.
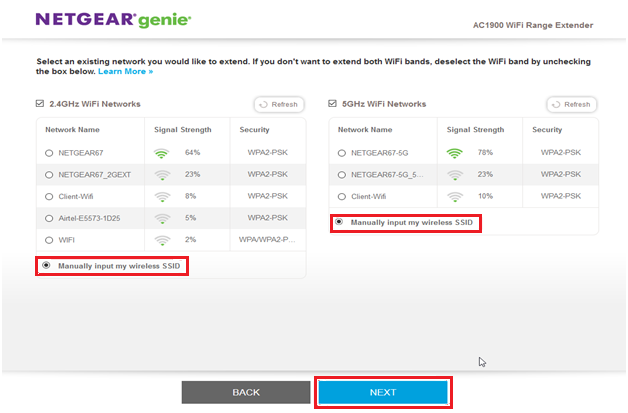
- Next, choose New Extender Setup.
- Your default username and password should be entered.
- Then, set up your Netgear Genie by following the instructions displayed on the screen.
You’ve now finished the Netgear genie setup procedure. We will discuss how to access Netgear genie in this article.
What is the Netgear genie login procedure?
You should need to download the Netgear genie in order to log in to the app. In Windows 10, Netgear Genie is employed.
The Netgear genie login process only takes 5 simple steps:
- Connect to the extender first.
- Launch your browser.
- Visit mywifiext.net now.
- Use your username and password to log in.
- Click again to log in.
- Please remember not to remove your extender while attempting to log in.
Netgear Genie Setup
How To Connect To Netgear Genie Setup
Netgear Genie Setup
You may upgrade your Netgear extender by following these easy steps:
- To the Netgear extender, connect. Activate your browser. Visit mywi-ext.net
- Use your username and password to log in.
- Select “Firmware update” from the menu.
- Select the most recent firmware from the administration bar.
- The firmware upgrade will take a few minutes, perhaps two.
- Don’t switch the power off when performing the update.
- Your Netgear extender then begins to reset.
- You may upgrade your Netgear firmware using this method.
- If your Netgear extender is providing you any problems after the setup process.
- Then you may easily phone or use live chat to speak with our qualified specialists.
What is the Netgear genie login procedure?
You should need to download the Netgear genie in order to log in to the app. On Windows 10, Netgear Genie is employed.
The Netgear genie login process only takes 5 simple steps:
- Connect to the extender first.
- Launch your browser.
- Visit mywifiext.net now.
- Use your username and password to log in.
- Click again to log in.
- Please remember not to remove your extender while attempting to log in.

You may upgrade your Netgear extender by following these easy steps:
To do the Netgear extender Setup Follow These Steps:
- Activate your browser.
- Visit mywi-ext.net
- Use your username and password to log in.
- Choose “Firmware update” from the menu.
- Choose the most recent firmware from the administration bar.
- The firmware upgrade will take a few minutes, perhaps two.
- Don’t switch the power off when performing the update.
- Your Netgear extender then begins to reset.
Note: You may upgrade your Netgear firmware using this method. If your Netgear extender is providing you any problems after the setup process. Then you may easily phone or use live chat to speak with our qualified specialists.
Netgear genie issues | Netgear Troubleshoot Guide
Accessing your Netgear Genie Smart Wizard Via Mywifext.net Setup Page giving you any problems? Not to be concerned. Just use the troubleshooting advice provided to resolve the problem:
- Verify that your Netgear extender is plugged into a working WiFi network.
- You should clear the cookies and cache from your web browser.
- Verify that the internet connection on your device is activated.
- Enter the website address.
- Change your web browser.
- Restart the router and extender once.
- Verify the WiFi extender’s firmware version. Upgrade it as soon as possible if it is outdated.
- Try returning the extender’s settings to default.
Netgear Genie Smart Wizard Login Setup Guide
HowTo Setup Netgear Genie Wizard App?
Netgear Genie is a desktop application that allowed users to manage and monitor their Netgear routers. It provided a user-friendly interface to configure various settings and troubleshoot network issues.
Please note that there might have been updates or changes to the Netgear Genie application or setup process after my last update. However, I can still provide a general guide on how to set up Netgear Genie. If there have been significant changes or if you encounter any issues during the setup, I recommend checking the latest documentation on the Netgear website.
Here are the general steps to set up Netgear Genie:
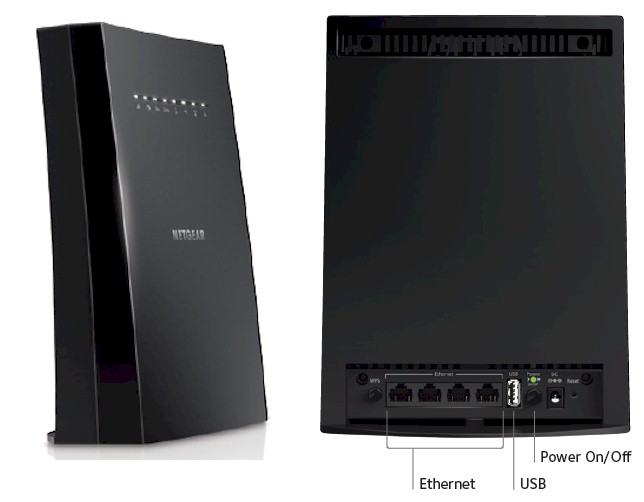
Connect your Netgear Router: Start by connecting your Netgear router to your modem using an Ethernet cable. Make sure the connections are secure.
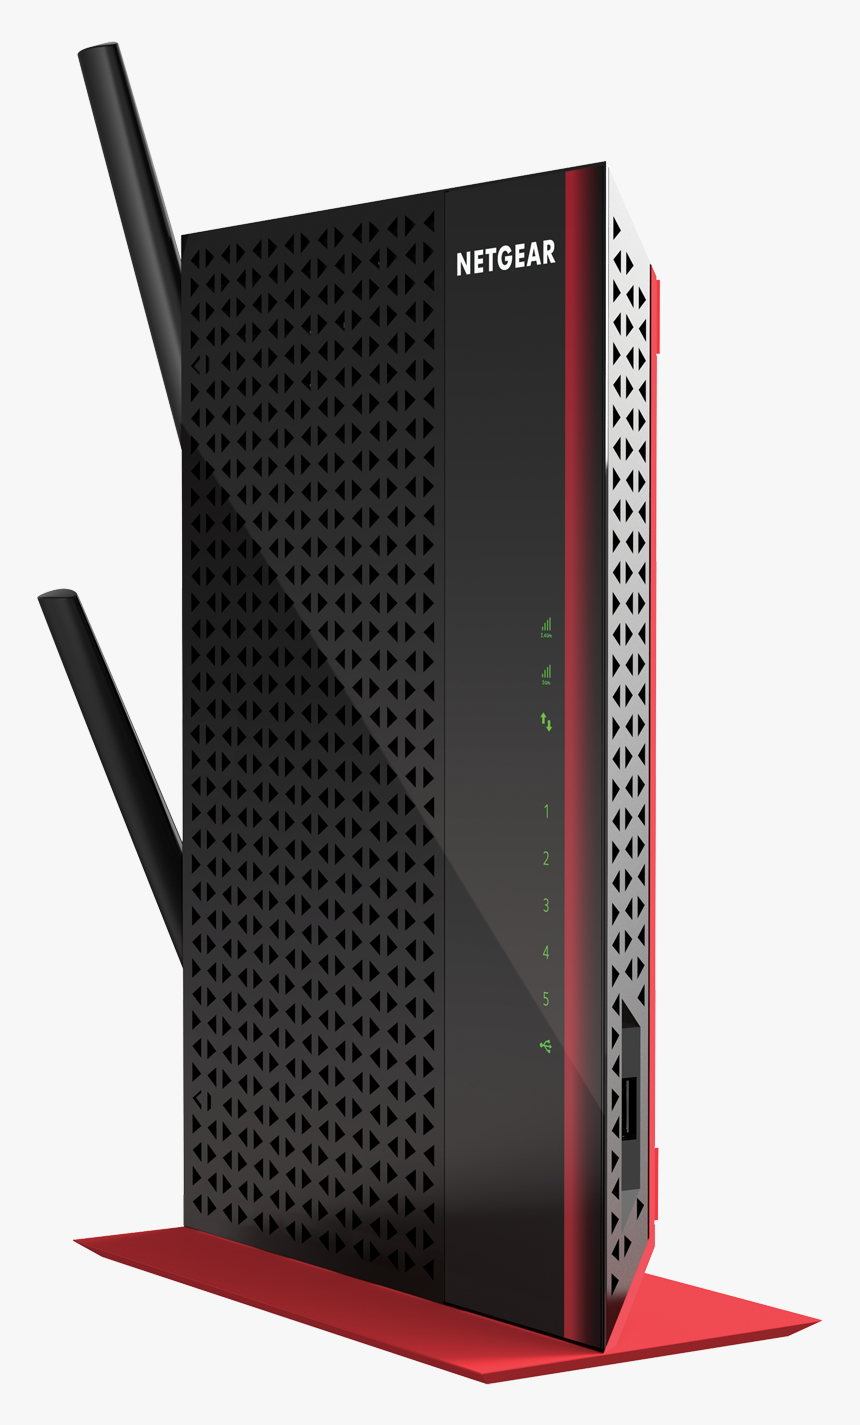
Power on the Router: Plug in the power adapter to your router and connect it to a power source. The router should power on, and the LED lights on the front should start blinking.
Connect to the Router: Use a computer or mobile device to connect to the router’s Wi-Fi network. Look for the default Wi-Fi name (SSID) and password, which can usually be found on a label at the bottom or back of the router.
Open a Web Browser: Once connected to the router’s Wi-Fi network, open a web browser on your device.
Access Netgear Genie: In the web browser’s address bar, type “http://routerlogin.net” or “http://192.168.1.1” (the default Netgear router IP address) and press Enter. This will take you to the Netgear Genie login page.
Login to Netgear Genie: At the login page, enter the default username and password. The default credentials are usually “admin” for both the username and password (without the quotes). If you have changed the login credentials before, use the updated ones.
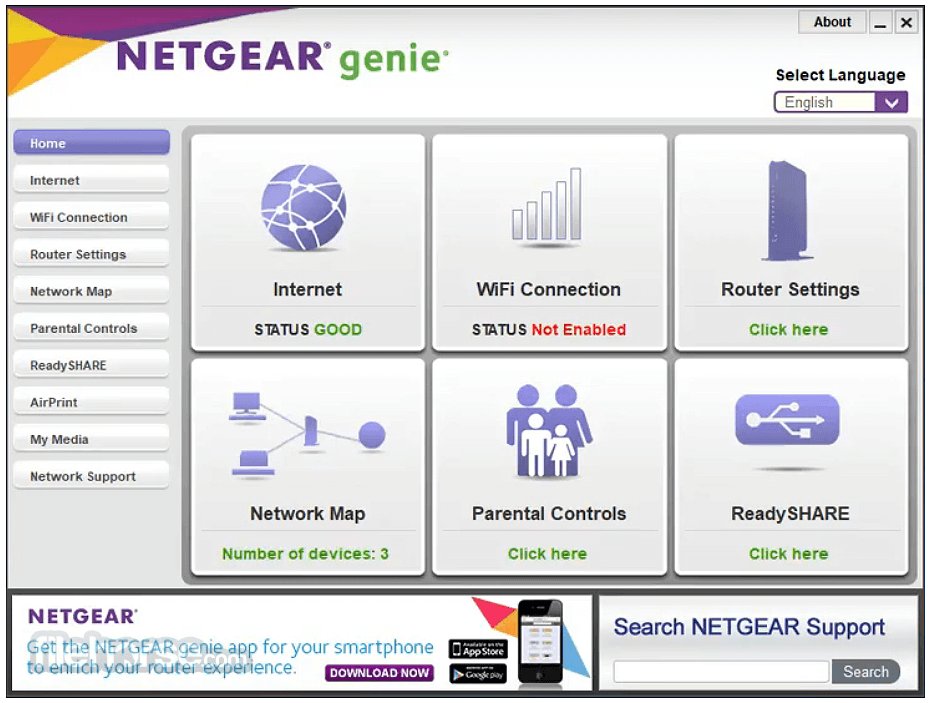
Netgear Genie Dashboard: After successfully logging in, you will be redirected to the Netgear Genie dashboard. This dashboard will display various options for managing your Netgear router.
Setup Wizard: Netgear Genie might prompt you to run a setup wizard to configure basic settings for your router. If prompted, follow the on-screen instructions to set up your internet connection and wireless settings.
Configuration: Once the setup wizard is complete (if applicable), you can use the Netgear Genie dashboard to configure various settings for your router. These settings may include wireless network settings, security options, guest network setup, parental controls, and more.
Save Settings: Remember to save any changes you make to the router’s configuration. Usually, there’s a “Save” or “Apply” button within the Netgear Genie interface to save the settings.
That’s a general guide on how to set up Netgear Genie. However, please keep in mind that the user interface and setup process might have evolved, and the steps might differ slightly depending on your router model and the version of Netgear Genie available at the time of your setup.
If you encounter any difficulties during the setup process, it’s always a good idea to refer to the official Netgear documentation or reach out to Netgear support for further assistance.
The programme is called Netgear Genie, and it works on Mac, iOS, Windows, and Android devices. You can manage, monitor, diagnose, update settings, and repair your home network equipment using Netgear Genie. Using an interactive visual design makes controlling your home network more enjoyable without the need for expertise. Don’t let the name fool you; this programme may be used for a variety of tasks, including configuring routers and other home network equipment for businesses. If you want to learn more, browse the website.
With the help of this programme, you can do a wide range of tasks, including remote access, setting up parental controls, monitoring activity, configuring devices, granting access, diagnosing and fixing networks, and much more. If you’re interested in learning more, look around our website.
Yeah, there is a big difference between the two as Netgear genie smart setup is used to manage your home network and set up your devices while Netgear genie application is accessible for devices such a window, mac, and phone.