How to Connect With

The default IP address for setting up a new extender or configuring an existing one is 192.168.1.250. Most of the time, people have problems understanding it. You must first comprehend what it is tied to in order to comprehend what it accomplishes and how to access it. To access the private networks of the Wi-Fi extender, use this IP address. In order to understand 192.168.1.250 or mywifiext.net in more detail, let’s first gain some knowledge about Netgear extenders. A device used to increase a router’s signal and coverage is called a Netgear extender. Signal strength and the number of devices that may be connected to Wi-Fi networks are frequently constrained.

192.168.1.250

192.168.1.250

Default Login IP Page:

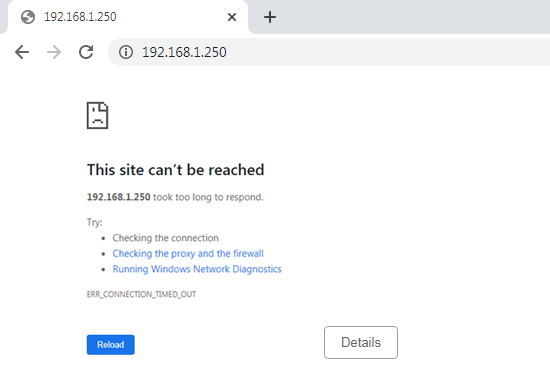
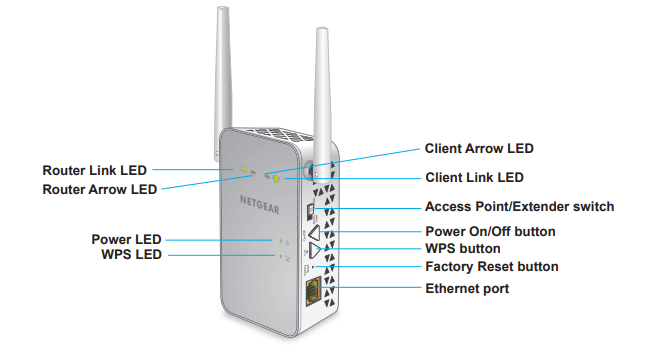
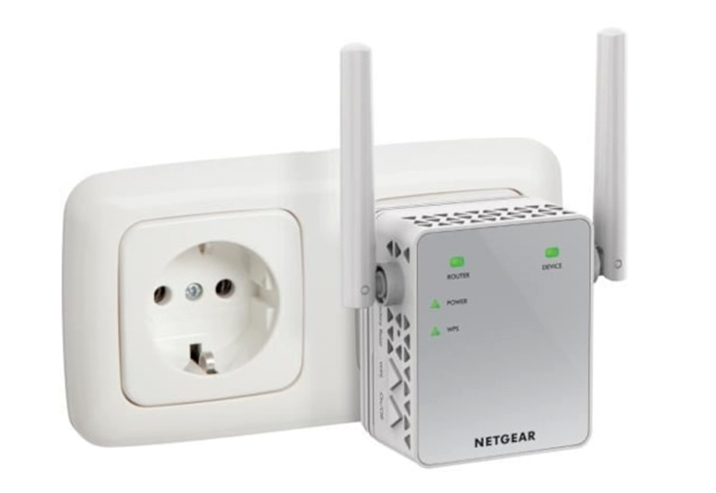
You may access your WiFi extender’s advanced settings as well as perform a fresh extender setup when you log in to the 192.168.1.250 admin page. Let’s have a look at the advanced settings that are accessible after inputting the default IP address for your wireless extender.


Do you have a problem? Don’t worry! Simply click on the chat window in the bottom-right corner to receive immediate and permanent assistance from our qualified specialists.

How Can You Get To 192.168.1.250?

To access 192.168.1.250, adhere to the directions provided.

  • On your updated laptop or PC, launch a web browser.
  • Then, enter 192.168.1.250, the Mywifiext login IP address, into the address bar.
  • The Mywifiext login screen will appear once you enter this IP address and press the enter key.
  • Number one on the list
  • You must first enter your username and password in order to access the page.

192.168.1.250

mywifiext

Mywifiext Setup Via 192.168.1.250

Lorem ipsum dolor sit amet, consectetur adipiscing elit. Ut elit tellus, luctus nec ullamcorper mattis, pulvinar dapibus leo.

mywifiext

Let’s go over how to use 192.168.1.250 to update the firmware on your Netgear wifi extender:

  • Start by turning on your WiFi extender.
  • Open a web browser after that.
  • Type http://192.168.1.250 into the address field and click Go.
  • You’ll be directed to the login page. Contact our experts right away if the login page won’t open or show errors, and the issue will be fixed in a matter of minutes.
  • As soon as the login screen displays, enter the username and password to continue.
  • Now, the Netgear dashboard is visible.
  • From the drop-down menu, choose Firmware Update.
  • Enter the firmware file’s location and click the Upload button.
  • Give the firmware upgrade procedure time to complete. After that, restart your extender.
  • You’ve now successfully upgraded the extender’s firmware.

Customers may also be unable to reach Netgear’s default IP address for the following reasons:


  • issues with the SSID and the pre-shared keyI’m unable to establish an internet connection.
  • Using a faulty IP address
  • The extender is not set up properly.
  • The availability of wifi is spotty.
  • Having trouble setting up your home network
  • Intellectual property (IP) issue DNS-related technical issues
  • The wireless range is insufficient.
  • The server is not accessible.

Can't Access Mywifiext Via 192.168.1.250

mywifiext